![]()
ILL ADMINISTRATION
Chapter 9. CUSTOMER SUPERUSER
Configuring the System Wide Lender List
The System Wide Lender List should contain all the ILL participant libraries registered as potential lenders for your SHAREit system. Libraries should be entered in the list in descending order of preference.
NOTE: The System Wide Lender List can be edited only by Customer SuperUsers
To access and edit the System Wide Lender List:
- Log in to the customer-level account for your SHAREit system (see the System Basics User Guide for details).
- Access Configure Lender Lists (see Configuring Lender Lists for details).
- On the Configure Lender Lists screen, select System Wide.
- The Configure Lender List screen refreshes to display the currently defined values for the System Wide Lender List.
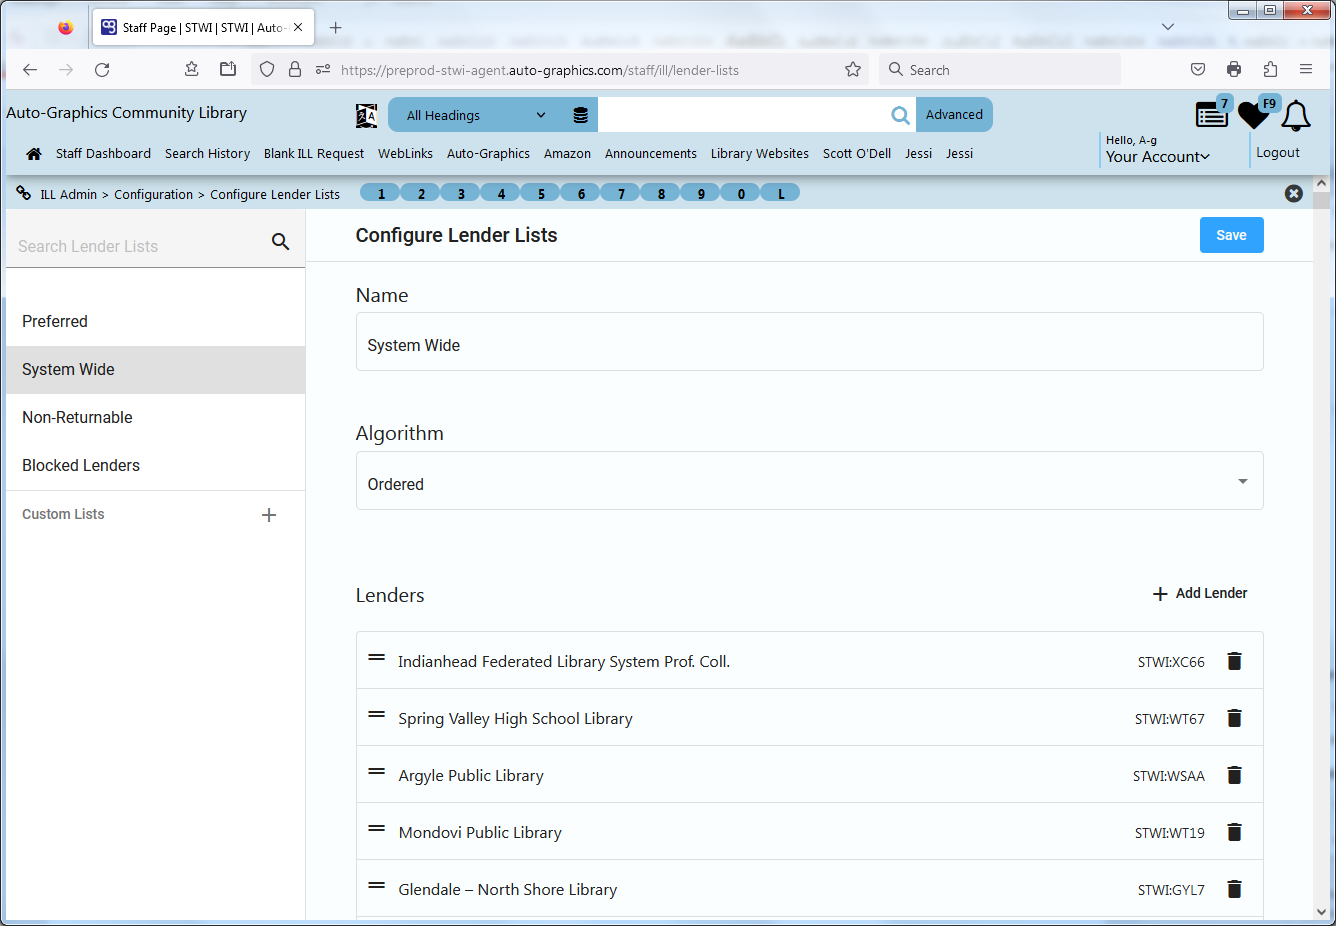
- The Name field shows the name of the Lender List.
NOTE: The Name field is read-only.
- Select the desired load-leveling algorithm for the Lender List from the Algorithm menu, Ordered or Random (see Understanding Load Leveling Algorithms for details).
- Add, arrange and/or deleted lenders in the Lenders list as desired (see Adding, Arranging and Deleting Lenders in Lender Lists for details).
- When all desired changes have been made, click the Save button to
save your changes.
- If you try to exit the page without saving your changes, an advisory
dialog displays the message “You have unsaved changes. Do you want to
continue?”
- Click the Cancel button to close the advisory dialog, then click the Save button to save your changes. (Click the Ok button to close the advisory dialog and discard your changes.)
- If you try to exit the page without saving your changes, an advisory
dialog displays the message “You have unsaved changes. Do you want to
continue?”